

Configuring timesheet settings in Beebole
Opening Timesheet and Planning Settings
Open the Settings menu
Go to Account Settings
Open the Timesheet and Planning Settings panel
Period & submission
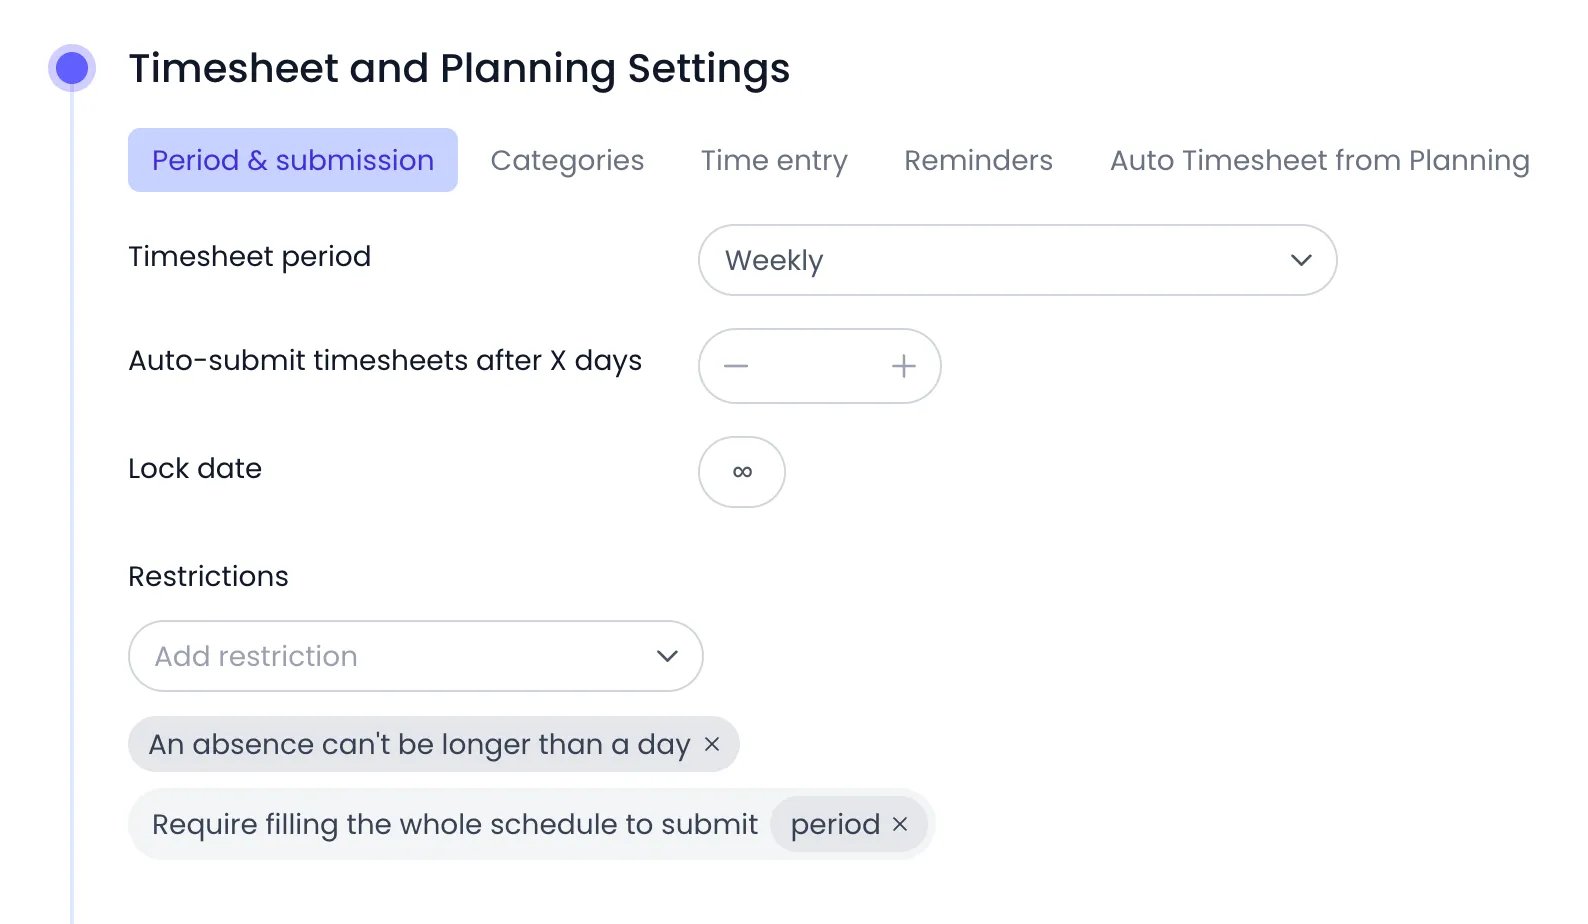
The Period & submission tab, with the account's weekly period and its two default restrictions
Timesheet period
The Timesheet period defines the stretch of time a timesheet covers — the period people fill in, submit, and have approved as one unit. It is not just a display preference: each period is one timesheet.Auto-submit
Auto-submit timesheets after X days submits unsubmitted timesheets automatically once the configured number of days has passed since the period ended. The auto-submitted timesheet enters the approval workflow like a manual submission. Leave the value at 0 to disable auto-submit. For people with no approval workflow, auto-submit approves and locks the period directly, without notifying anyone. It is the only way their periods close: they have no Submit button, since there is nobody to submit to. At the deadline, suggested time entries still pending on the period are converted into real entries before the submission, so a timesheet assembled from suggestions submits itself. Every entry still respects the entry rules — a suggestion a restriction refuses is trimmed to fit the day’s remaining scheduled time, or skipped if it still doesn’t fit. Timesheet reminders announce the deadline in advance, so nobody is surprised by an automatic submission. Auto-submit only ever acts on one period per person: the most recent one whose deadline has passed. Older periods are never revisited, so switching the setting on doesn’t submit months of history at once. A period that already has a status — submitted, approved, or rejected — is left alone, and an empty period is never submitted: if it holds no time entries and no suggestion could be converted, nothing is sent to approvers. If a period can’t be processed, it stays a draft and is badged Auto-submit failed in the approval view — administrators are notified so they can review it by hand.Lock date
The Lock date freezes every time record on or before the chosen day. Time records on or before that day can no longer be created, edited, moved, or deleted — by anyone, administrators included. Attempts are refused with the message Timesheet and Planning Settings prevent any change to the locked date. Use it to close accounting periods: once payroll or invoicing for a month is done, set the lock date to the end of that month and the underlying data can’t drift. The freeze applies everywhere time records change hands, including the BambooHR time-off sync. The lock date covers time records only, meaning timesheet entries and time off. It does not freeze planning: tasks and bookings dated on or before the lock date stay fully editable, including their dates, planned time, and owner, and Beebole has no setting that blocks planning changes before a date. Time already logged on those tasks stays locked like any other entry. To limit who can change planning, restrict Edit access on the Tasks permission in roles. The lock also closes the period to submission. A period whose last day is on or before the lock date can no longer be submitted for approval — Beebole answers This period is locked and cannot be submitted for approval. A period that straddles the lock date stays submittable by hand, since its unlocked days are still the person’s to account for, but auto-submit leaves it alone: it skips any period that starts on or before the lock date. When several entries are deleted at once — clearing a section, or deleting a selection in the calendar — Beebole checks every entry before removing any of them. If one of them falls on or before the lock date, nothing is deleted.Restrictions
The Restrictions list controls what time entries the timesheet accepts. New accounts start with two restrictions active: An absence can’t be longer than a day and Require filling the whole schedule to submit (period). When none is active, the panel shows No restrictions configured. Pick a rule from the Add restriction menu to activate it; click the × on a restriction’s chip to remove it.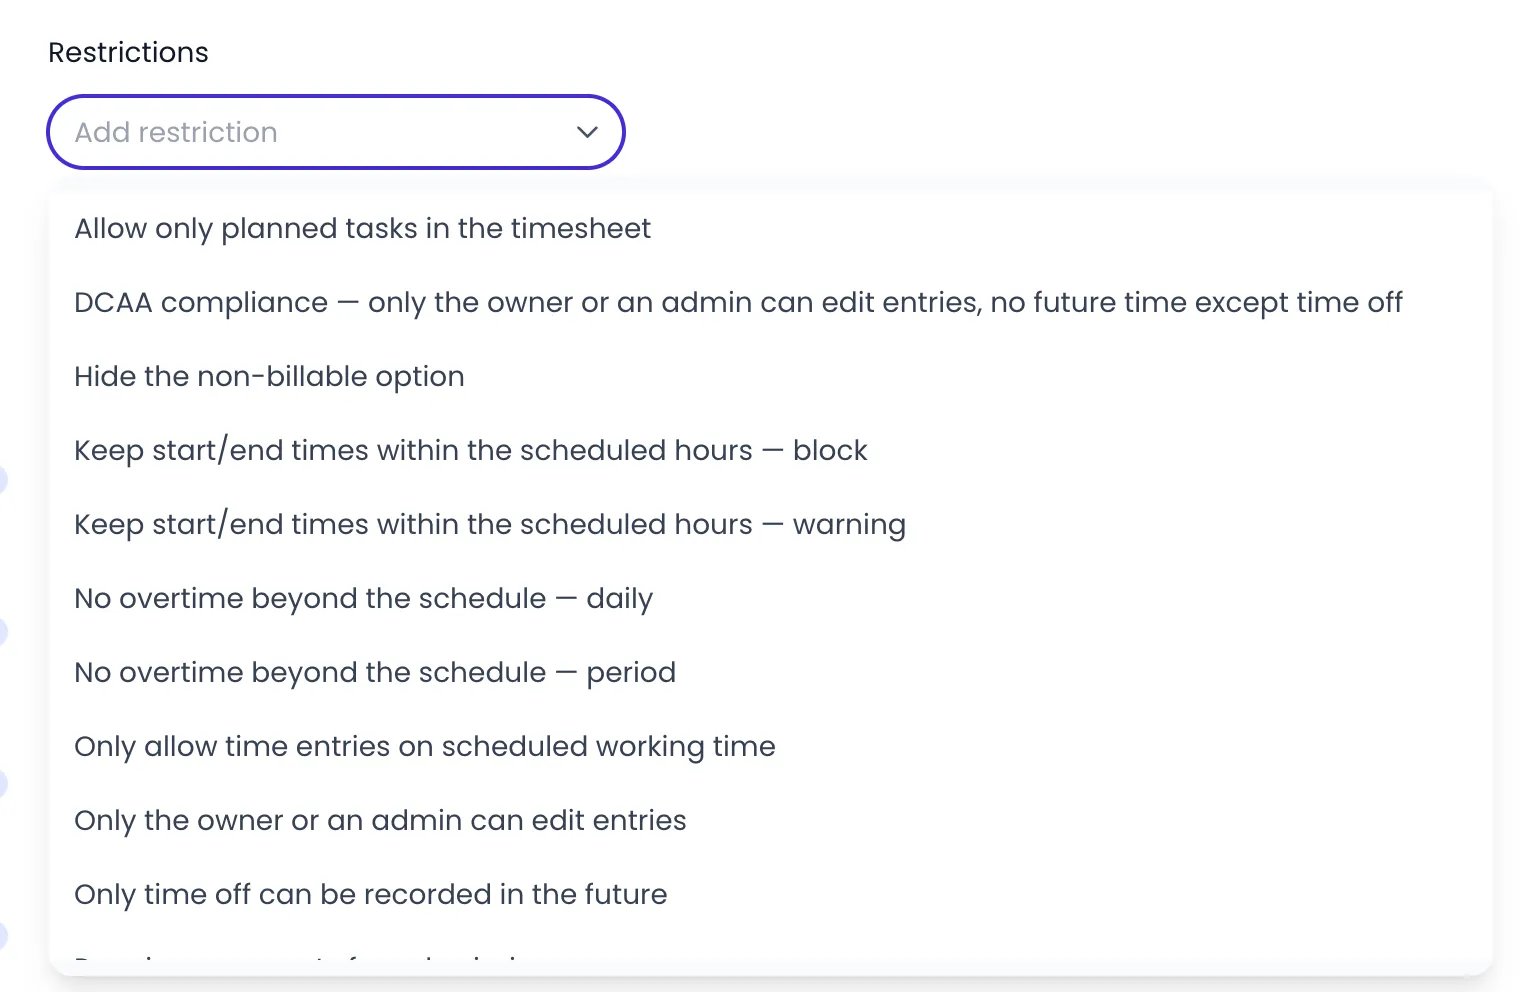
The Add restriction menu, listing the rules not yet active
Rules set elsewhere
Two more rules apply to every time entry without appearing in the Restrictions list, because they are configured on the items they protect:- Valid period for time entry — This panel, available on a project, a person, and a tag, sets a From and To date between which time can be logged. An entry outside the window is refused with This time record falls outside the validity period of: followed by the project or person it comes from. When several windows could apply, the most specific one wins: the entry’s project first (its deepest level first), then the person, and a person or project inherits a window set on its tags.
- Time off allowances — A time off entry can’t push the person past the balance of the allowance that covers that day. Beebole refuses it with This booking exceeds the available quota for: followed by the absence type. An allowance with Allow negative balance checked lifts the limit for the days it covers, and an absence type with no allowance is never limited.
Time entry
The Time entry tab defines what people type into a timesheet cell.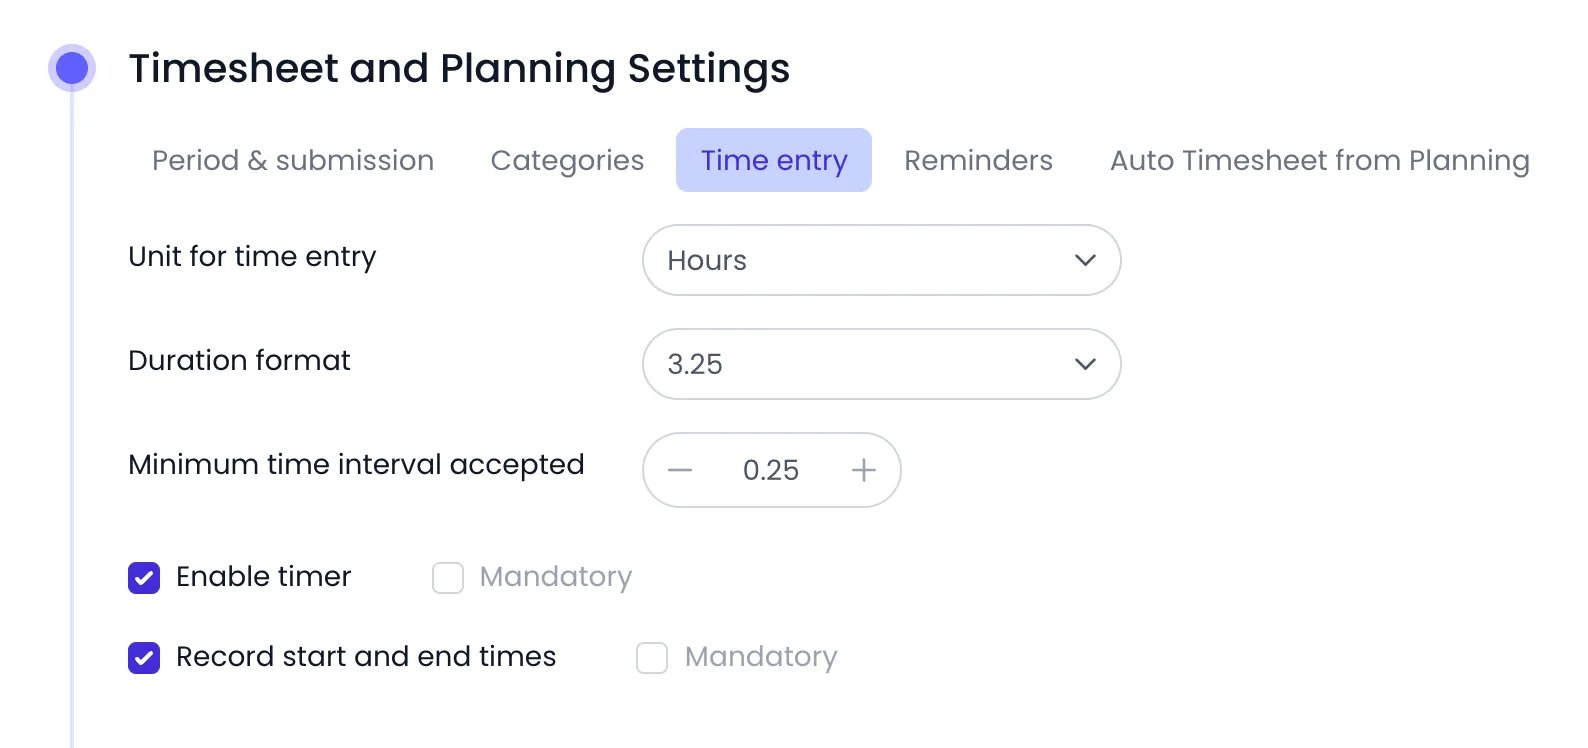
The Time entry tab, with hours in decimal format, the timer, and start and end times switched on
Unit for time entry
Unit for time entry sets the unit for every timesheet cell:Duration format
When the unit is Hours, two more options appear:- Duration format — how hour values are displayed and typed: 3:15 (hours and minutes), 3.25 (decimal hours), or 3h15 (compact hours-and-minutes notation).
- Minimum time interval accepted — the smallest increment the timesheet accepts. Durations are rounded up to the nearest multiple of this interval; new accounts start at 15 minutes.
Timer and start and end times
- Enable timer adds a timer button to each timesheet row so people can time their work as it happens — see Using the timer. Check Mandatory next to it to require the timer: durations can then only be recorded by running it. A timer left running stops on its own at the end of the person’s scheduled hours that day, or, when the schedule gives no end, at the end of the planned task it runs on, and at the latest at the end of the following day. Its owner then gets an email and a push notification, see Timers left running.
- Record start and end times adds Start time and End time fields to each entry’s details, and Beebole calculates the duration. Check Mandatory next to it to require start and end times on every entry.
Categories
The Categories tab decides what people can track time on. Each choice becomes a section of rows in everyone’s timesheet.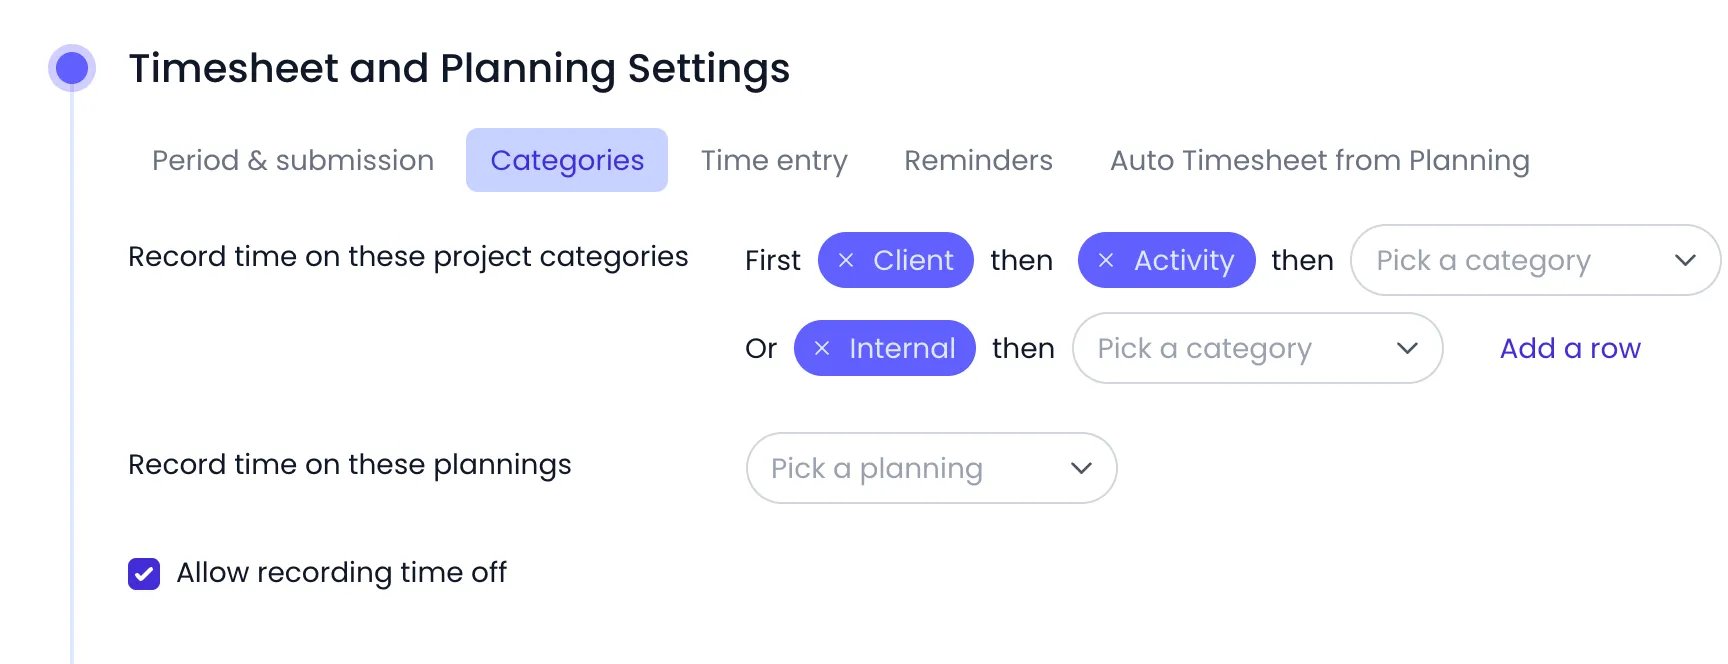
The Categories tab: a Client then Activity section, an Internal section, and time off allowed
Project categories
Record time on these project categories lists the project categories available in the timesheet. Each row of the list is one timesheet section:- A row with a single category — for example Client — lets people pick one project from that category per timesheet row.
- A row with chained categories — First Client, then Activity — makes people pick one entry for each level: first a client project, then an activity.
- Click Add a row to offer an alternative section, and pick its categories with Pick a category.
Plannings
Record time on these plannings does the same for tasks: people can add timesheet rows for tasks in the selected plannings (task categories). Add one with Pick a planning. While the Allow only planned tasks in the timesheet restriction is on, the plan decides instead. Record time on these plannings becomes read-only, with the note Only planned tasks are available: every planning counts. The tasks a person owns reach their timesheet whatever their planning. Record time on these project categories shows Only used to justify a booking’s time on a project. People can’t add project rows then, and these categories only serve to log the time of a booking on its project.Time off
Allow recording time off controls whether a Time Off section appears in the timesheet, where people add rows for absence types. See Time off.Reminders
The Reminders tab configures two kinds of follow-up.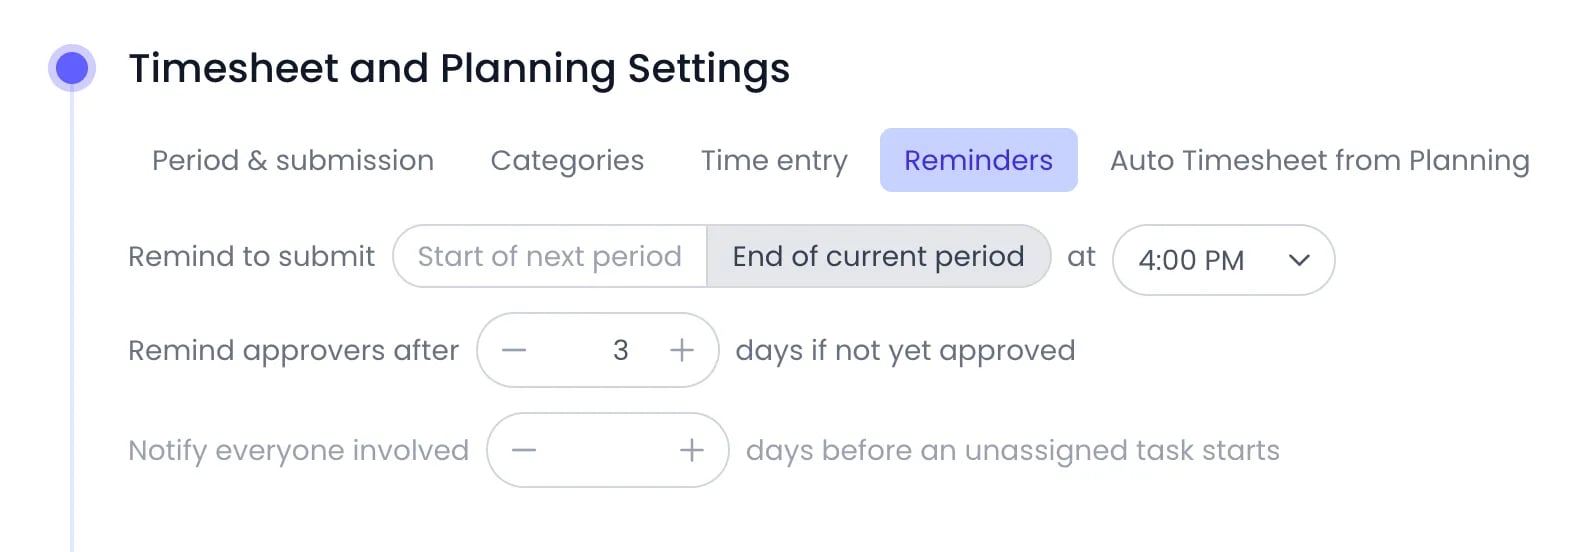
The Reminders tab: reminders to submit at the end of the current period at 4:00 PM, approvers reminded after 3 days
Reminding people to submit
Remind to submit sends a reminder by email, by push, or both, following each person’s notification settings. It goes only to people who have an approval workflow and whose timesheet for the period is still a draft or was rejected: without a workflow there is nothing to submit, so no reminder is sent. Choose when it goes out:- Start of next period — on the first day of the new period, about the period that just ended.
- End of current period — on the last day of the period being filled.
Reminding approvers
Remind approvers after a number of days if not yet approved follows up on submitted timesheets that are still waiting for review. The first reminder goes out the configured number of days after the approver’s initial notification; while the timesheet stays pending, Beebole follows up a few more times at increasing intervals. Leave the value at 0 to disable approver reminders.Warning about unassigned tasks
Notify everyone involved a number of days before an unassigned task starts warns about planned work nobody has picked up. The task manager and the people assigned to the task are notified — the admins when the task has no manager. This setting exists account-wide only, and 0 disables it.Auto Timesheet from Planning
The Auto Timesheet from Planning tab turns work planned on tasks into timesheet entries, so people who did what was planned don’t have to fill their timesheet by hand.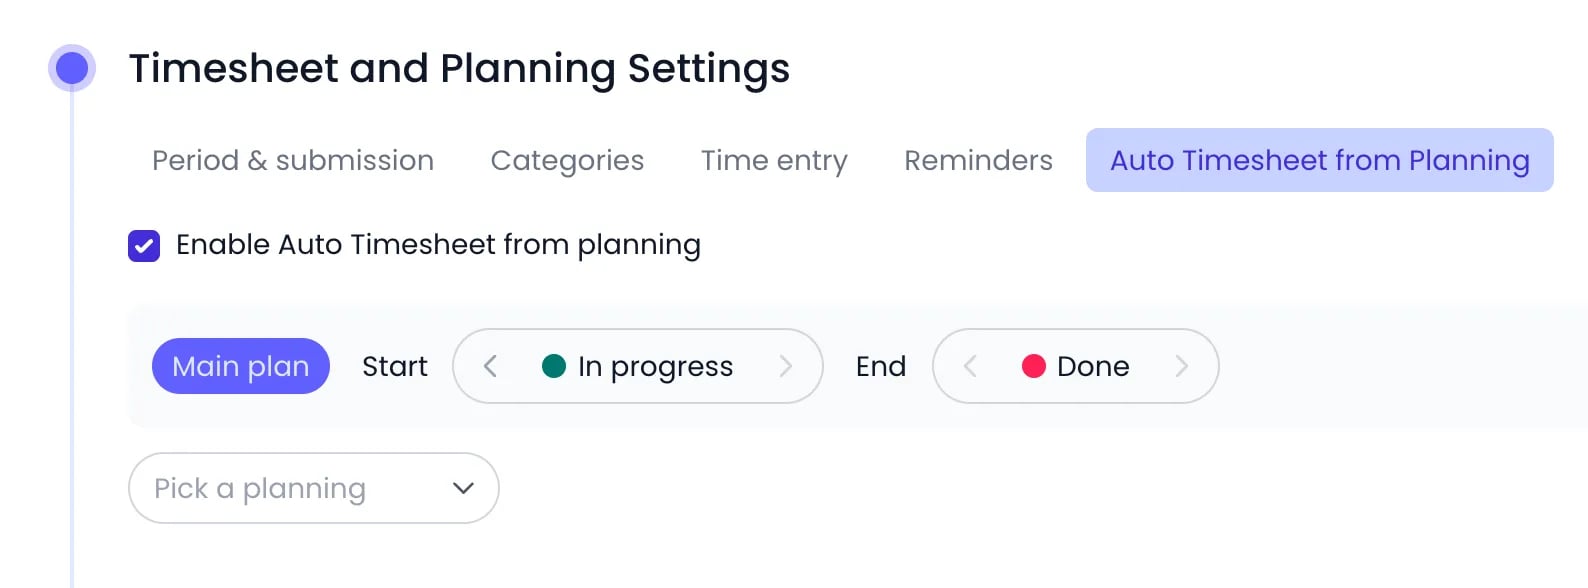
Auto Timesheet from Planning switched on for the Main plan planning, from In progress to Done
Enable it
Pick a planning
Review the suggestions
Different settings for different teams
Timesheet settings cascade. Values set on Account Settings apply to everyone, but the same Timesheet and Planning Settings panel also appears on every tag and on every person’s profile:- Set a value on a tag to override the account default for everyone under that tag — for example, a monthly Timesheet period for one department.
- Set a value on a person to override both the tag and the account default for that one person.
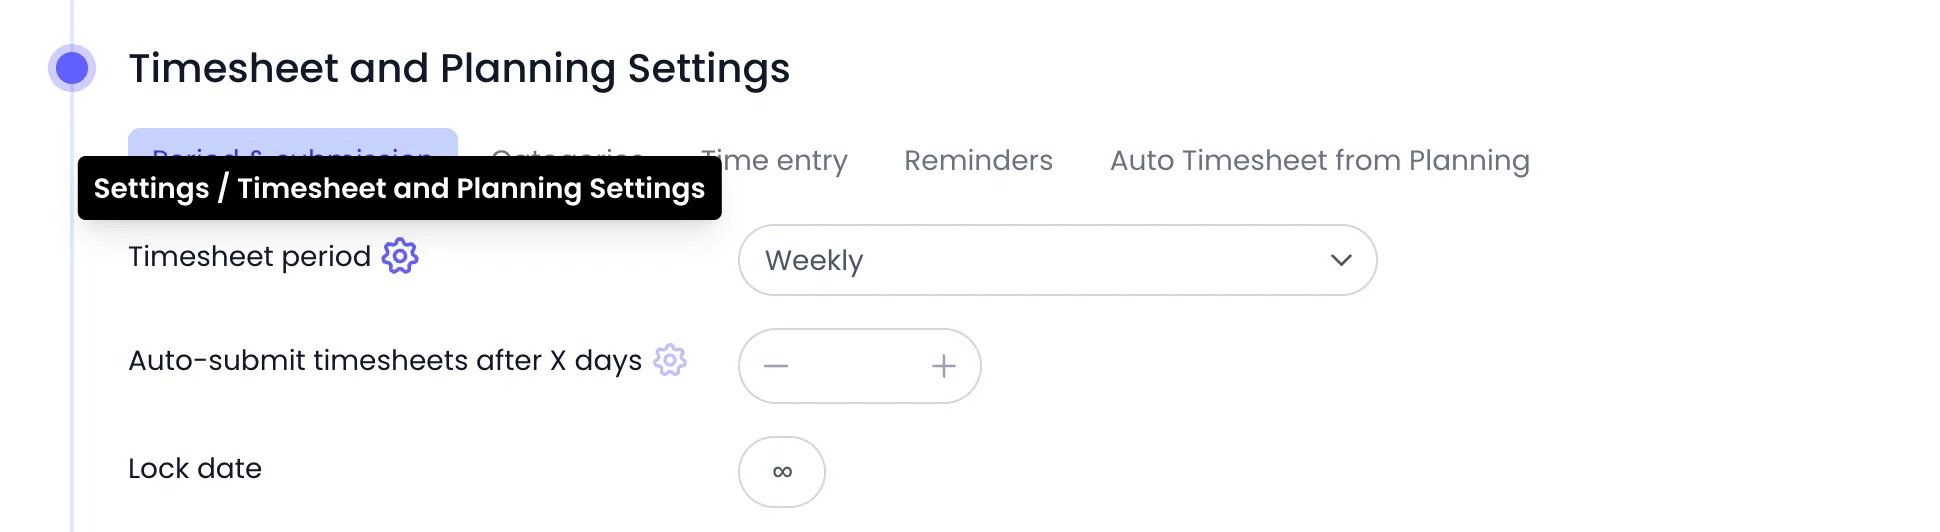
A person's panel, with every value inherited from Account Settings
Related content
Timesheets
Approvals
Work schedules
Account Settings
Frequently asked questions
How do I stop people from logging time in the future?
How do I stop people from logging time in the future?
Can different teams have different timesheet settings?
Can different teams have different timesheet settings?
What happens if someone forgets to submit their timesheet?
What happens if someone forgets to submit their timesheet?
How do I change the first day of the week?
How do I change the first day of the week?
Can I lock time entries for a single project?
Can I lock time entries for a single project?
Who can set the lock date — project managers or only admins?
Who can set the lock date — project managers or only admins?